
Contents
- Overview
- Installation
- Setup
- Settings
- Starting the Server
- Stopping the Server
- Monitoring and Error logs
- Un-Installation
- Upgrading QuickBooks (NZ/AU)
- Troubleshooting
Related Documents
Xact Link for ACT! and QuickBooks Server Guide
Step 2 – Configure QB Link Server
Make sure current Windows login has administrative privileges.
- Run QB Link Server
-
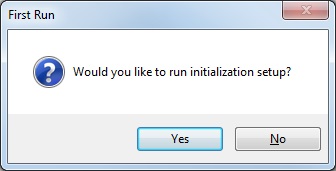
Select Yes to run initialization setup
-
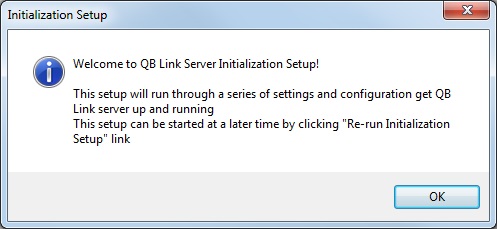
Click OK to proceed
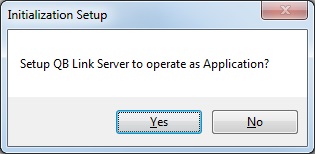
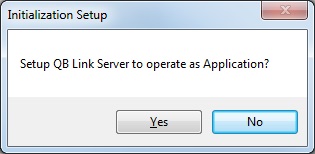
To setup QB Link Server as a Windows Service skip to Step 2b – Windows Service Setup otherwise continue to Step 2a – Setup as Windows Application
Step 2a – Setup as Windows Application
-
Select Yes to configure QB Link Server as Application
-
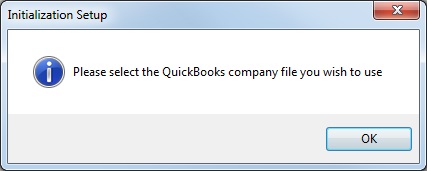
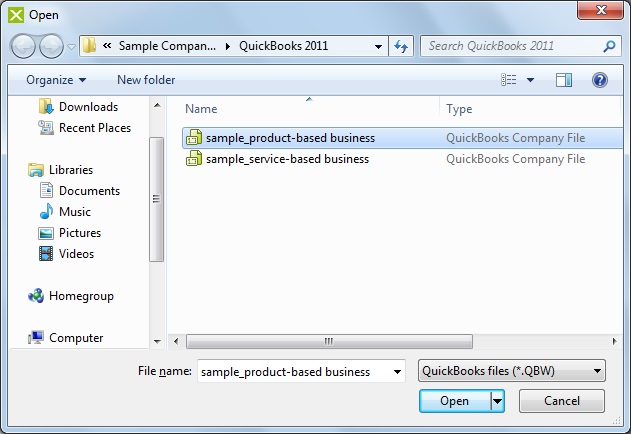
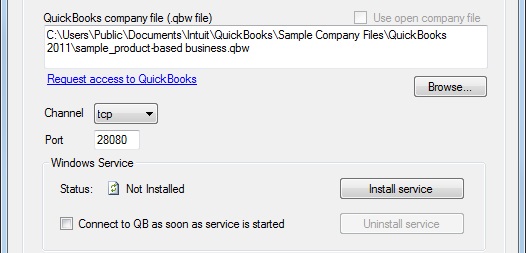
Select the QuickBooks company file (“qbw” file)

-
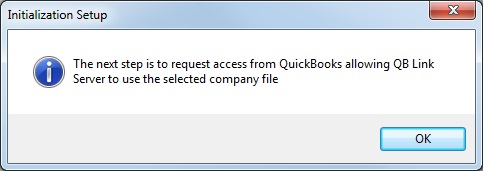
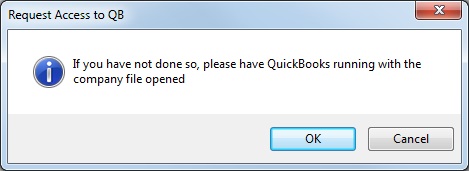
The next step is to request permission from QuickBooks so QB Link Server has access to the company file selected at previous step

-
Make sure QuickBooks is running with the company file opened (make sure you login as Admin).
Click OK to proceed

-
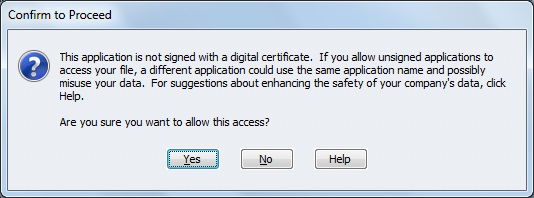
Now, switch back to QuickBooks and the following dialog should appear. See Troubleshooting section if this is unsuccessful.

- Select Yes, always; allow access even if QuickBooks is not running option
- Set Login as: drop down to QBLinkServer
- Click Continue to proceed
-
Click Yes to confirm and click Done to dismiss the following dialog box

- Switch back to QB Link Server
-
Click OK to save the settings.
If prompted select Yes to allow QB Link Server to save the settings to disk.
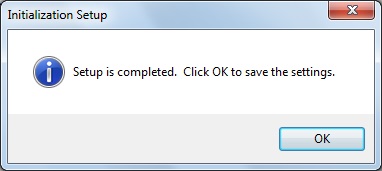

Setup is now completed.
Step 2b –Windows Service Setup
For some of this setup you would need to have Windows administrator privileges
-
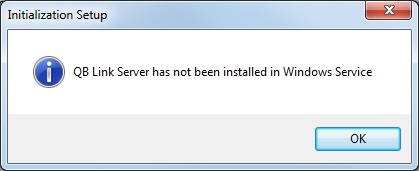
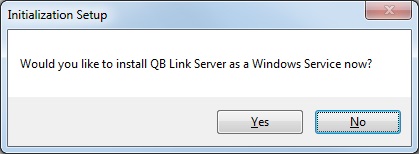
Select No to operate QB Link Server as Windows Service
-
The following prompt is notifying that QB Link Server has not been installed or registered in Windows Service.
-
We recommend creating a new Windows user where QB Link Server will run under.
Select No as we will set this up later after creating a new Windows user
-
Select the QuickBooks company file (“qbw” file)

-
We will request access from QuickBooks after setting up a new Windows user account.
- Click Cancel to skip this step.
-
Click OK to save the settings. If prompted select Yes to allow QB Link Server to save the settings to disk.

-
Click OK to continue

- Exit QB Link Server
The next step is to create a new Windows User. You will need to be a Windows Administrator (or Domain Administrator in a Windows Server domain environment) to perform this task.
Creating a new windows user in Windows 7 Professional
-
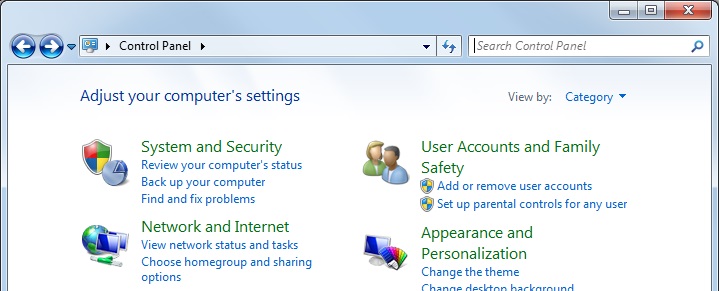
Open Windows Control Panel and select Add or remove user accounts
-
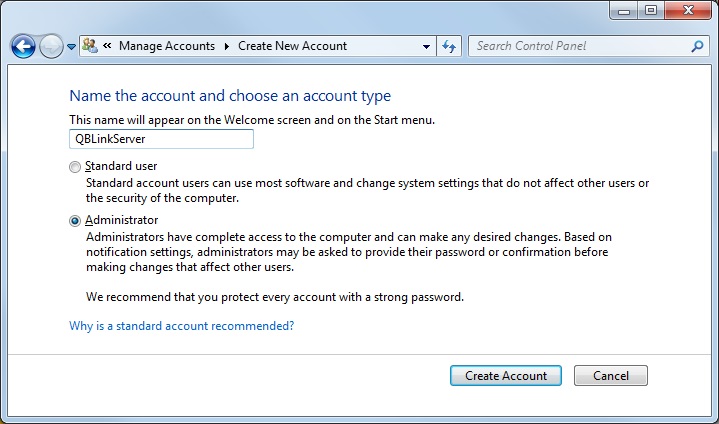
Click Create a new account

-
Type in “QBLinkServer” as the new user name (or pick any other unique name if you wish)
-
Make sure Administrator is selected as the user type
Click Create Account button to create a new user -
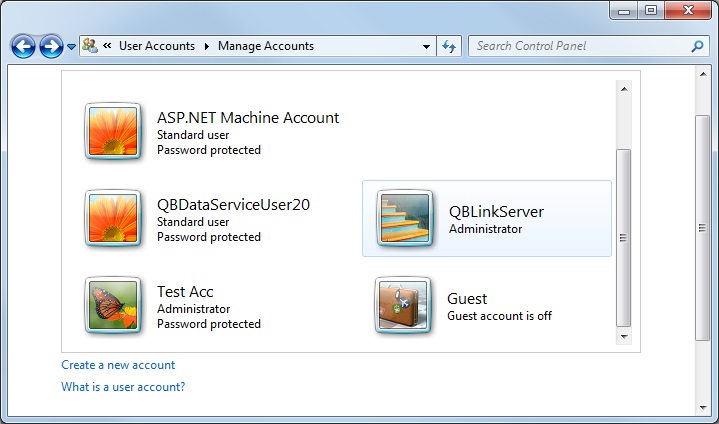
A new Windows user is now created
-
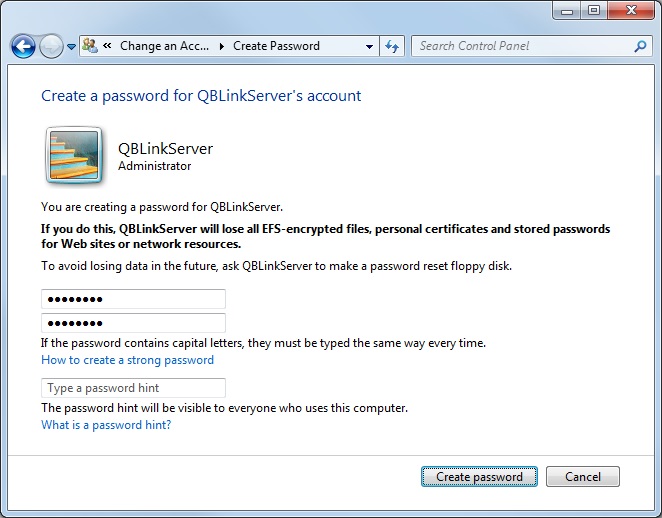
We now need to assign a password to this new account
- Click to open the account
-
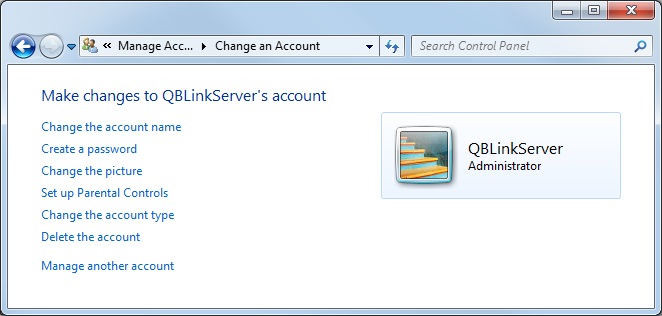
Select Create a password
-
Type in the password and click Create password
Creating new Windows user is completed.
Now that a new user is created the next step is to request permission from QuickBooks and install QB Link Server in Windows Services.
- Log off from the current Windows user
- Log into the new Windows user we have just created (“QBLinkServer”)
- Run QuickBooks with the company file open
- Run QB Link Server
-
Click Request access to QuickBooks
-
Click OK to confirm
-
Now, switch back to QuickBooks and the following dialog should appear. See Troubleshooting section if this is unsuccessful.
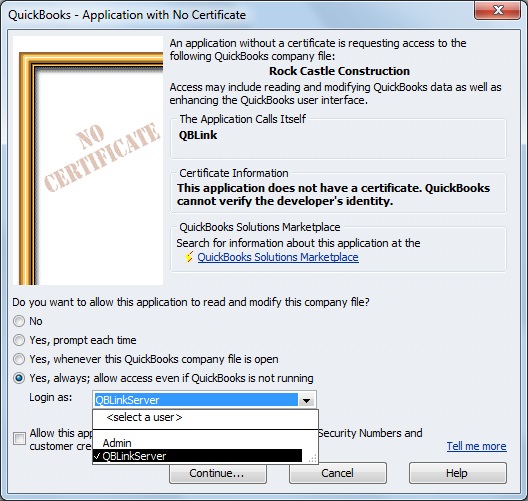
- Select Yes, always; allow access even if QuickBooks is not running option
- Set Login as: drop down to QBLinkServer
- Click Continue to proceed
-
Click Yes to confirm and click Done to dismiss the following dialog box.
- Close QuickBooks
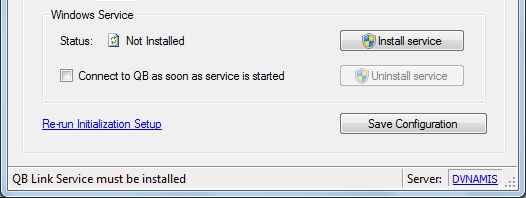
- Switch back to QB Link Server
-
Click Install service button, click OK to confirm.
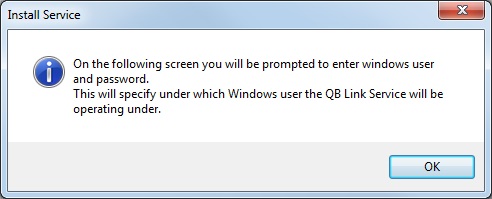
-
Click OK to proceed
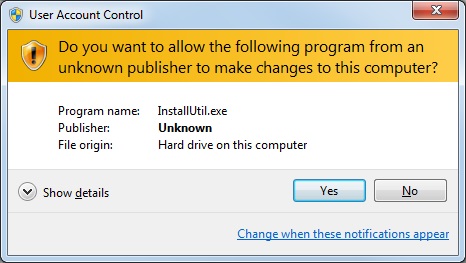
-
Click Yes to allow QB Link Server to be installed in Windows Services
-
Windows Service will show a dialog that prompt for the user name and password which this application will run under.
Type in the password you have set for “QBLinkServer”
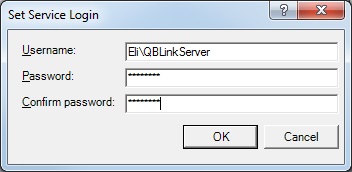
Technical Note:
Username is formatted as follows:[domain name]\[user name]
For local user, domain name may be replaced by computer name or a dot (‘.’) e.g. “.\QBLinkServer” -
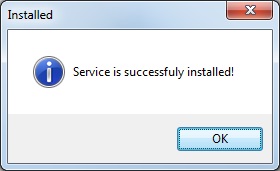
QB Link Server is now installed in Windows Services.
- Before starting the service make sure QuickBooks is closed