
Contents
- Introduction
- Overview of the link
- Configuring the Link
- Understanding Workflow
- Walkthroughs
- Link to an Existing QB Customer
- Create a new QB Customer from an ACT! Record
- Update a QB Customer from ACT!
- Create an Estimate, Sales Order or Invoice in ACT!
- Create an Invoice from an Estimate
- Create an Invoice from an ACT! Opportunity
- Create an Invoice from a Time & Billing Ticket
- Create an Invoice from Customer Sales History
- Generate a Document from an Existing Sales Item
- Attach a Transaction to ACT! History
- Monitor & Set an Alarm on Stock Levels
- View/edit credit card details (USA & CA only)
Related Documents
Xact Link for ACT! and QuickBooks User Manual
Overview
When installed the link adds a new tab under the contact detail view in ACT!, this tab provides access to the current contact record’s information within QuickBooks (provided the current ACT! contact record is linked to a QuickBooks account). In addition it provides access to an options window from the ACT! Tools menu.
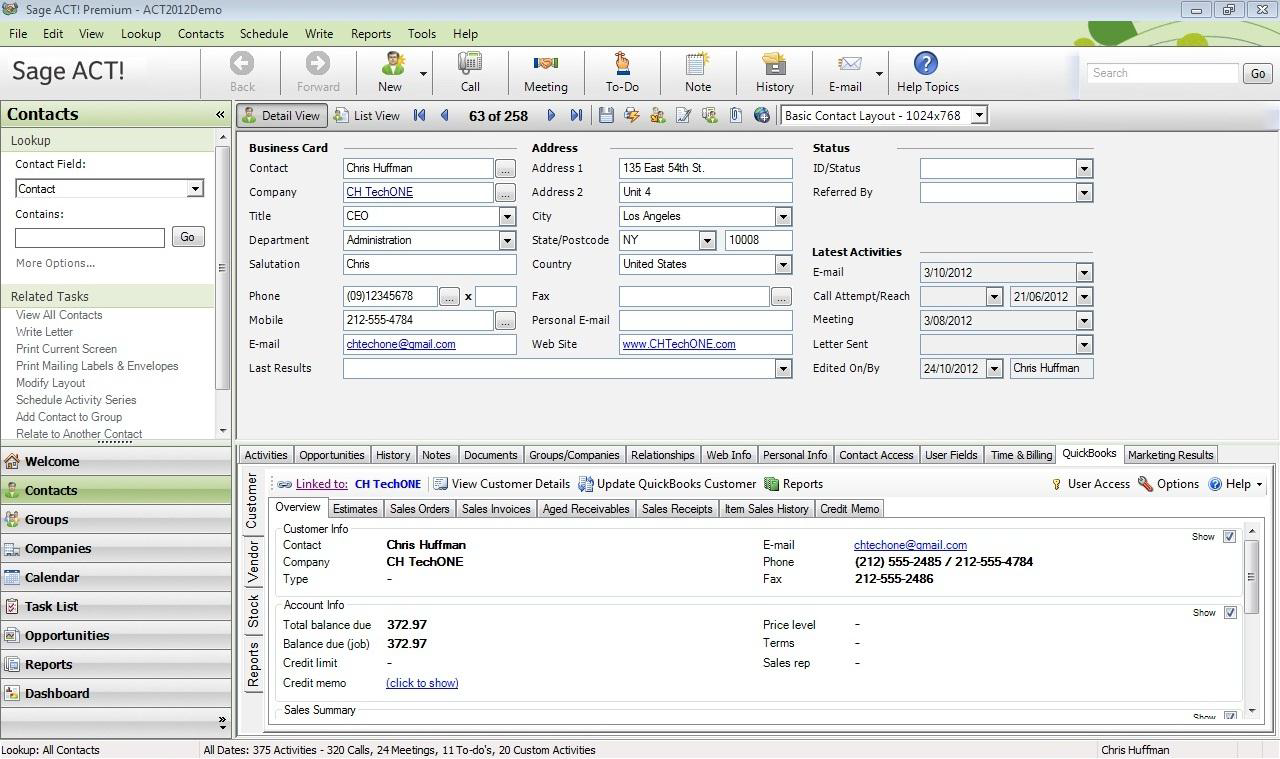
Customer Module
The top left side of the link shows you whether a link has been created between the current ACT! contact and a corresponding QuickBooks contact.
If no link has been created you will have the option to create a link yourself; you can choose to link to an existing QuickBooks customer or create a new QuickBooks customer.
If the link has been created you will see the name of the QuickBooks customer that is linked plus an option to update their details based on changes made in ACT!
- Overview Tab: This tab displays live pertinent information regarding the customer account, sales figures and current standings.
- Estimates, Sales Orders, Sales Invoices, and Sales Receipt Tabs: These tabs display the transactions of each type. Users can perform searches and filter the results using the appropriate options. To view the transaction details double click on the document line.
- Aged Receivables Tab: displays a listing of all open invoices within the 30, 60, 90+ day periods and their totals.
- Item Sales History Tab: list items previously purchased by the customer. Allows quick item invoicing.
- Credit Memo Tab: displays a list of credit memo’s applied to the customer.
Vendor Module
Like the Customer Module, the Vendor Module displays information about the currently linked vendor. If no link has been created you can create one yourself by clicking on the “Linked to” button.
- Overview Tab: This tab displays live pertinent information regarding the vendor account such as contact details and account information.
- Purchase Orders Tab: This tab lists all of the purchase orders against this vendor and provides users with the ability to create new purchase orders.
- Bills Tab: Lists all of the bills that have been sent from the vendor.
Transaction Form
To access the transaction form either create a new sales document or double click on a document you want to open.
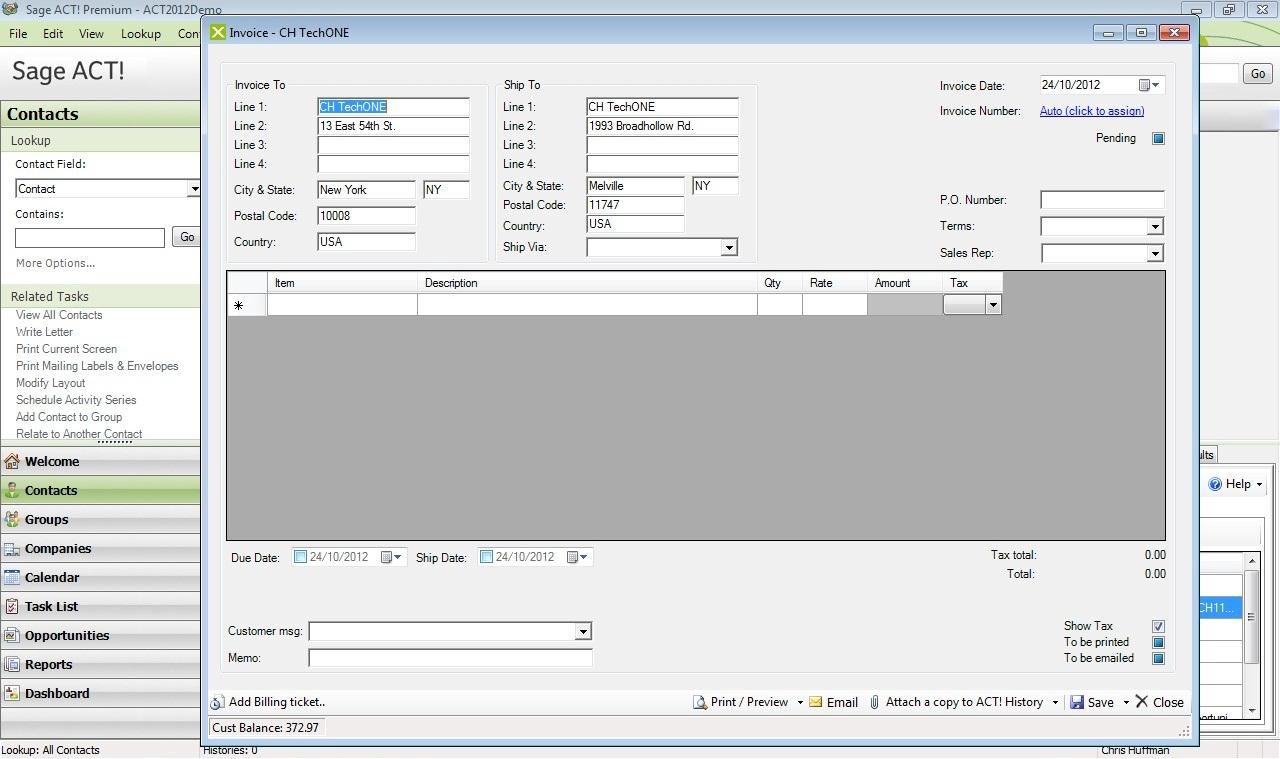
- Invoice/Ship To: The link will automatically insert the address details. To configure which address fields appear review your field mapping settings.
- Transaction Number: Can be entered manually. If left blank the link will automatically assign a transaction number from QuickBooks.
- Item list: Double click on the item field to display the items list. For items that have a longer description resize the box by dragging the row border in the far left column. To delete a line simply highlight the line you want to delete and press the “delete” key.
- Command bar: Provides options for printing, emailing, attaching and saving sales documents. Buttons with an arrow indicate additional options.
Stock Module
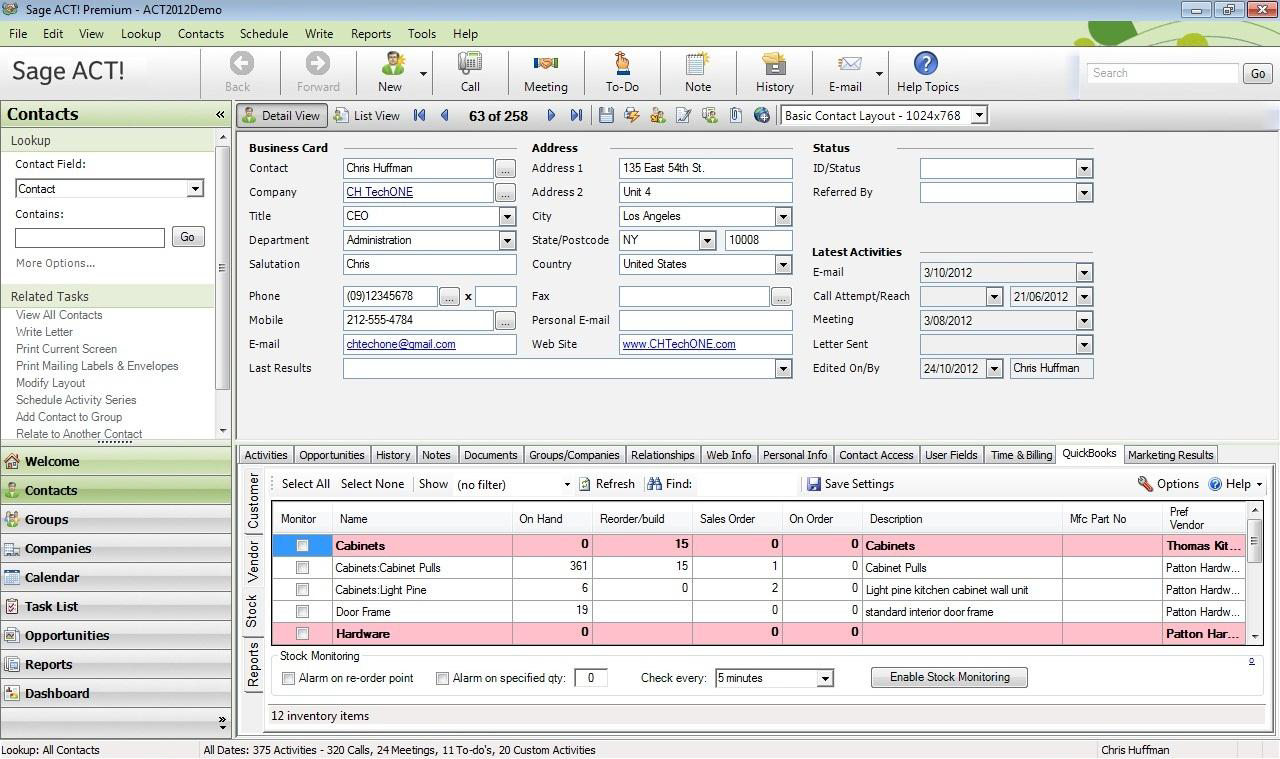
- Items list: Displays your QuickBooks items list. Items are highlighted according to their stock status.
- Stock monitoring settings: These settings determine how and when alarms are triggered.
Reports Module
For information on the reports module refer to the Reporting Overview document.
Data Exchange Window
Accessible by going to “Tools > Xact Link for QuickBooks” from the ACT! toolbar, the data exchange window provides options for importing, exporting and auto-linking of QuickBooks customer cards and ACT! contact records.